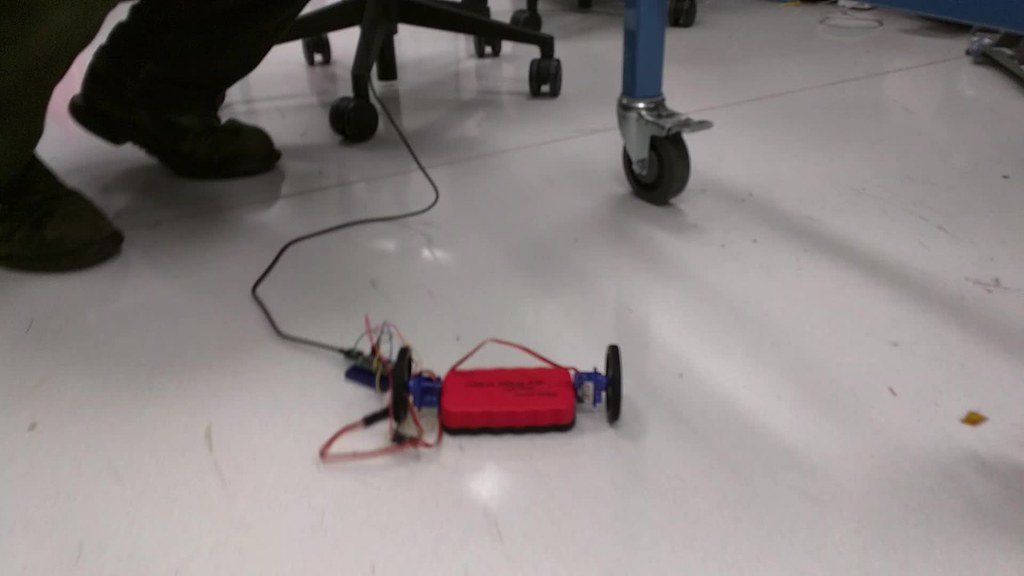
I created a magnetic cleaner using Teensy :)
Materials:
Wheels, motor and magnetic eraser.
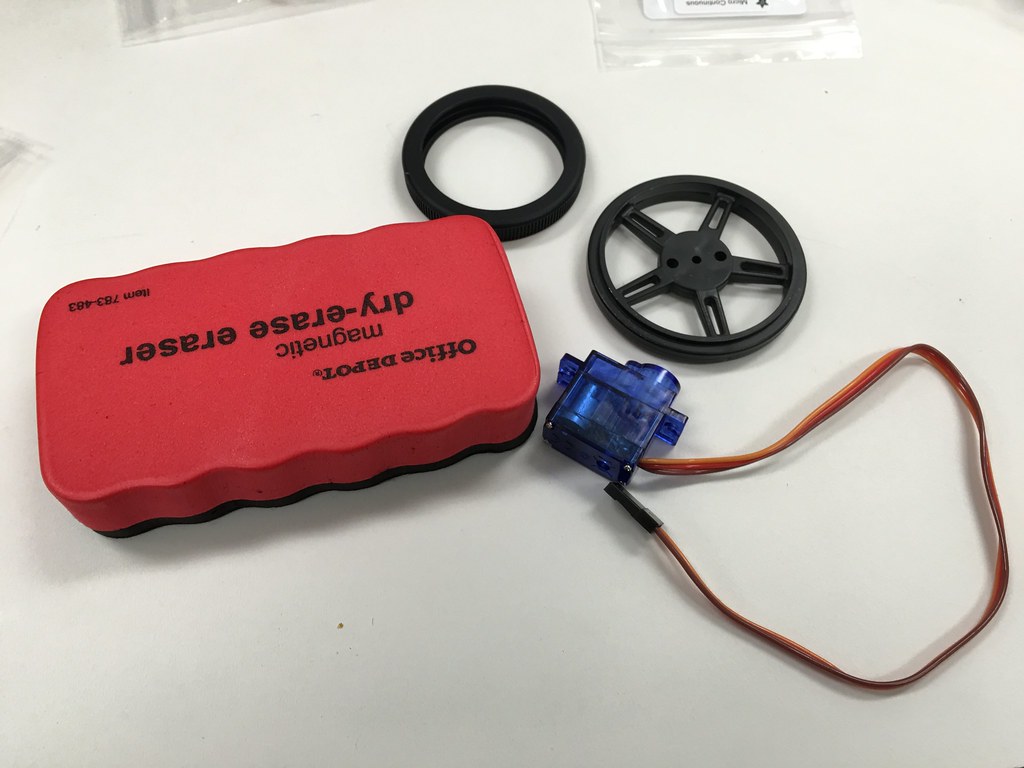
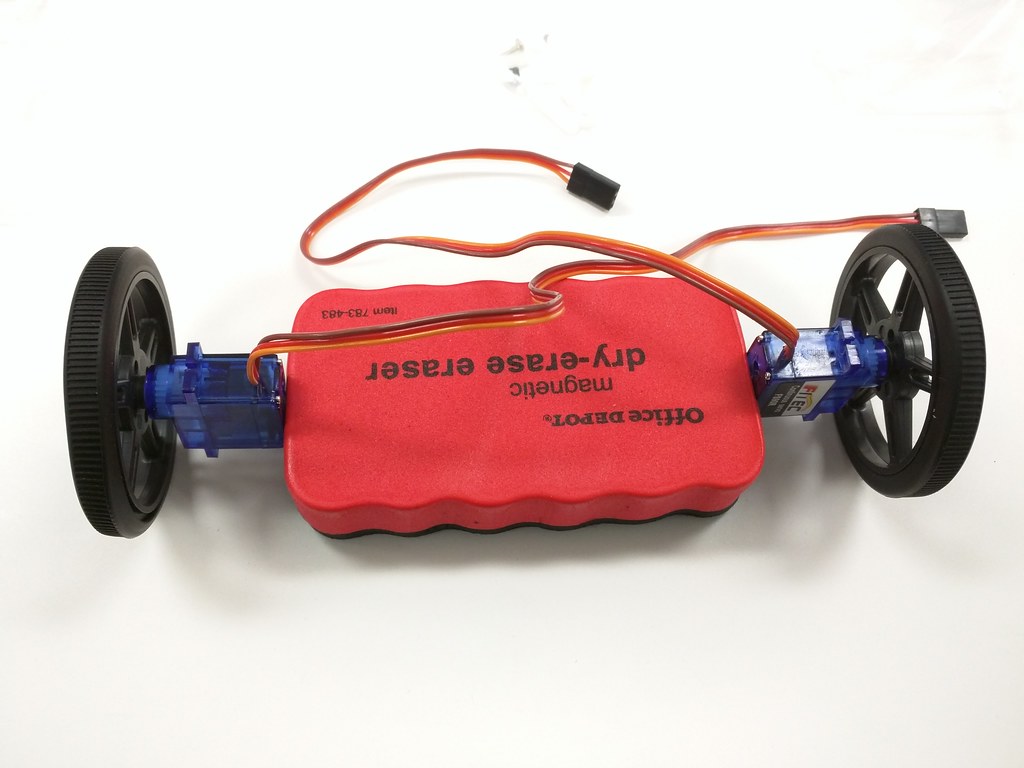
Assembly (using glue gun)
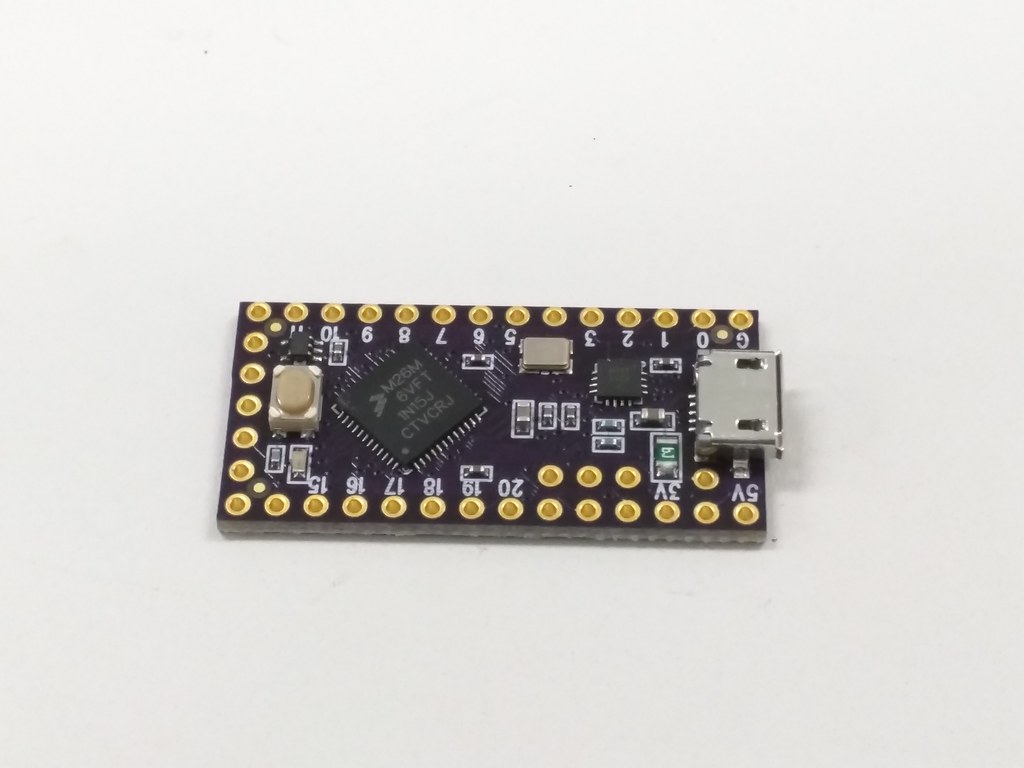
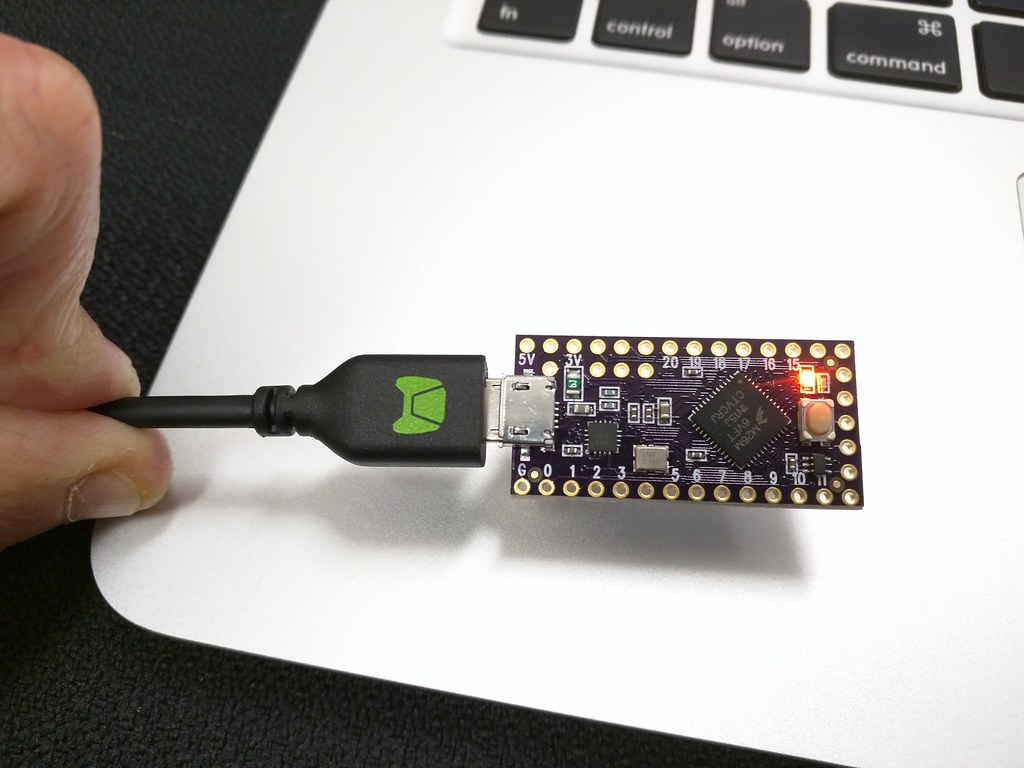
Teensy
This time, I used Teensy LC. It's extremely tiny, but has the following spec:
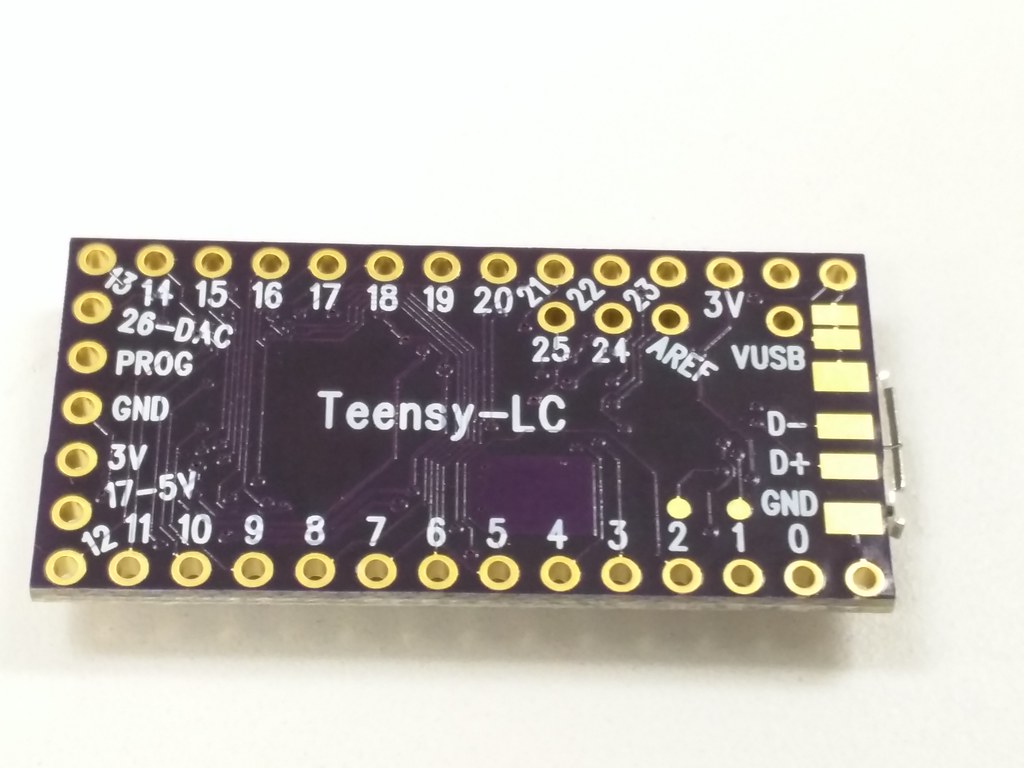
Pinouts of Teensy

Download Teensy Loader - which is an app that communicates with Teensy board.

LED lights up!
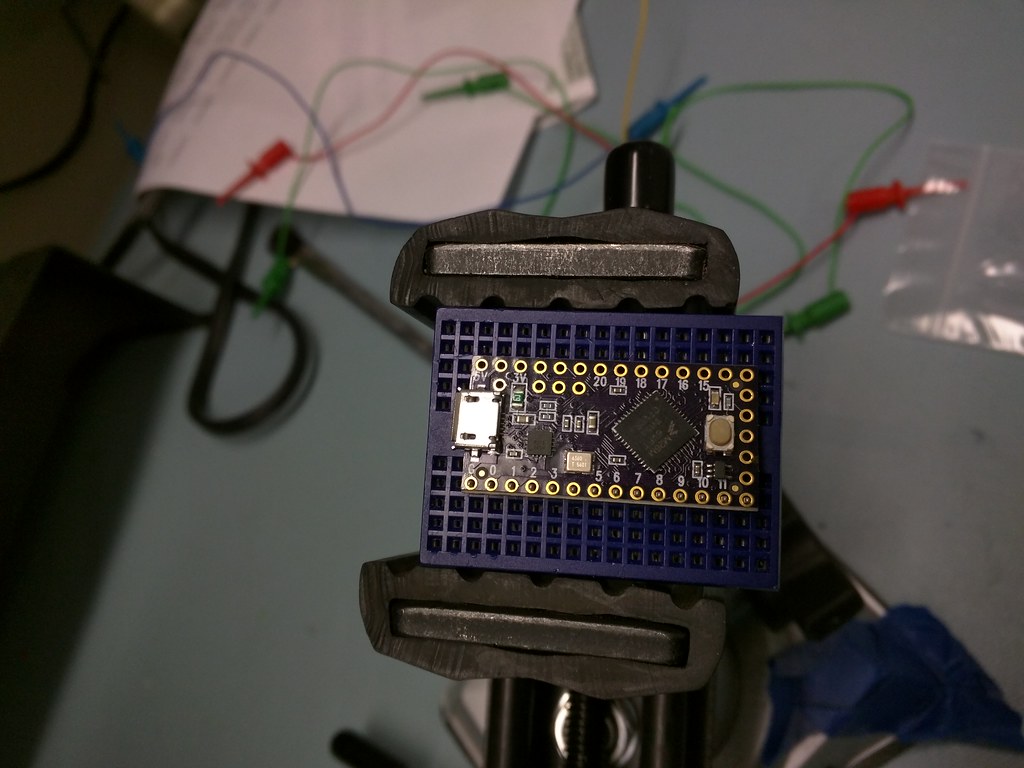
Solder legs:

Download Teensyduino - which is an add-on for Arduino software, this will enable us to talk with Tennsy board via Arduino.
Use Aruino's default "sweep" sample program, but amend a bit to control 2 wheels.
/* Sweep
by BARRAGAN <http://barraganstudio.com>
This example code is in the public domain.
modified 8 Nov 2013
by Scott Fitzgerald
http://arduino.cc/en/Tutorial/Sweep
*/
#include <Servo.h>
Servo servo1; // create servo object to control servo 1
Servo servo2; // create servo object to control servo 2
int pos = 0; // variable to store the servo position
void setup()
{
servo1.attach(9); // attaches the servo on pin 9 to the servo object
servo2.attach(10); // attaches the servo on pin 10 to the servo object
}
void loop()
{
for(pos = 0; pos <= 180; pos += 1) // goes from 0 degrees to 180 degrees
{ // in steps of 1 degree
servo1.write(pos); // tell servo to go to position in variable 'pos'
servo2.write(180 - pos);
delay(15); // waits 15ms for the servo to reach the position
}
for(pos = 180; pos>=0; pos-=1) // goes from 180 degrees to 0 degrees
{
servo1.write(pos); // tell servo to go to position in variable 'pos'
servo2.write(180 - pos);
delay(15); // waits 15ms for the servo to reach the position
}
}
Connect the pins on breadboard and connect with laptop and it works!
Next steps:
- Get a 5V battery so that I don't need to connect with laptop
- Hot Glue board and battery on the eraser so that cables don't get tangled
- Make a remote controler
Thanks to Greg Kielian for teaching me how to make this!
Disclaimer: The opinions expressed here are my own, and do not reflect those of my employer. -Fumi Yamazaki
Materials:
Wheels, motor and magnetic eraser.
Assembly (using glue gun)
Teensy
This time, I used Teensy LC. It's extremely tiny, but has the following spec:
ARM Cortex-M0+ processor at 48 MHz, 62K Flash, 8K RAM, 12 bit analog input & output, hardware Serial, SPI & I2C, USB, and a total of 27 I/O pins.
Pinouts of Teensy

Download Teensyduino - which is an add-on for Arduino software, this will enable us to talk with Tennsy board via Arduino.
/* Sweep
by BARRAGAN <http://barraganstudio.com>
This example code is in the public domain.
modified 8 Nov 2013
by Scott Fitzgerald
http://arduino.cc/en/Tutorial/Sweep
*/
#include <Servo.h>
Servo servo1; // create servo object to control servo 1
Servo servo2; // create servo object to control servo 2
int pos = 0; // variable to store the servo position
void setup()
{
servo1.attach(9); // attaches the servo on pin 9 to the servo object
servo2.attach(10); // attaches the servo on pin 10 to the servo object
}
void loop()
{
for(pos = 0; pos <= 180; pos += 1) // goes from 0 degrees to 180 degrees
{ // in steps of 1 degree
servo1.write(pos); // tell servo to go to position in variable 'pos'
servo2.write(180 - pos);
delay(15); // waits 15ms for the servo to reach the position
}
for(pos = 180; pos>=0; pos-=1) // goes from 180 degrees to 0 degrees
{
servo1.write(pos); // tell servo to go to position in variable 'pos'
servo2.write(180 - pos);
delay(15); // waits 15ms for the servo to reach the position
}
}
Connect the pins on breadboard and connect with laptop and it works!
Next steps:
- Get a 5V battery so that I don't need to connect with laptop
- Hot Glue board and battery on the eraser so that cables don't get tangled
- Make a remote controler
Thanks to Greg Kielian for teaching me how to make this!
Disclaimer: The opinions expressed here are my own, and do not reflect those of my employer. -Fumi Yamazaki
0 件のコメント:
コメントを投稿